

Working in Unreal Engine
Unreal Engine 5.8 includes an MCP server that lets a coding agent inspect and edit a project in the Unreal Editor. Pair it with the Gameface MCP server and the agent can work on both the UI and implementation tasks in a Gameface project : changing the Unreal project and checking the page Gameface renders.
This guide walks through connecting the servers, the kinds of UI work they support, and how to check the result in the game.
What Each Server Does
Section titled “What Each Server Does”The servers give the agent access to different parts of your workflow:
| Unreal MCP | Gameface MCP | |
|---|---|---|
| Runs in | The Unreal Editor | A Node.js process that connects to the Gameface Player |
| Lets the agent | Inspect and edit UMG widgets, Blueprints, assets, and levels; start Play-In-Editor; read the output log | Read the Gameface console; inspect the DOM and styles; take screenshots; check layout |
| Helps answer | What is in the project? | What did Gameface actually render? |
With only Unreal MCP, the agent can change project files but cannot inspect the rendered Gameface page. With only Gameface MCP, it can inspect the page but cannot edit Unreal assets. With both connected, it can make a change, run the UI, and use the console and page inspection tools to find problems.
Quick Setup
Section titled “Quick Setup”-
Enable the Unreal plugins
Section titled “Enable the Unreal plugins”In Unreal, open Edit > Plugins, enable Model Context Protocol, Editor Toolset, and UMG Toolset, then restart the editor.
-
Start the Unreal MCP server
Section titled “Start the Unreal MCP server”Open Editor Preferences > Model Context Protocol. Turn on Auto Start Server and Enable Tool Search, and keep the default address:
http://127.0.0.1:8000/mcp. -
Install the Gameface MCP server
Section titled “Install the Gameface MCP server”Follow Setting up the MCP Server if you haven’t already.
-
Add the Unreal server to your agent
Section titled “Add the Unreal server to your agent”Create the configuration file in the Unreal project folder, beside the
.uprojectfile. It only needs the Unreal entry. Thegamefaceentry comes from the Gameface MCP install; if your agent doesn’t have it yet, see Client Configuration..mcp.json {"mcpServers": {"unreal-mcp": {"type": "http","url": "http://127.0.0.1:8000/mcp"}}}.vscode/mcp.json {"servers": {"unreal-mcp": {"type": "http","url": "http://127.0.0.1:8000/mcp"}}} -
Check that it works
Section titled “Check that it works”Start the Unreal Editor, then ask the agent:
List the Unreal MCP toolsets, then launch the Gameface Player and take a screenshot.
The agent should return a list of Unreal toolsets and an actual screenshot from the Player. If it only describes what it expects the screen to look like, the Gameface server is not connected to the Player.
Common UI Tasks
Section titled “Common UI Tasks”With both servers connected, an agent can help with several parts of a Gameface UI workflow. These examples show what to ask for and what to check afterward.
Convert a UMG screen to Gameface
Section titled “Convert a UMG screen to Gameface”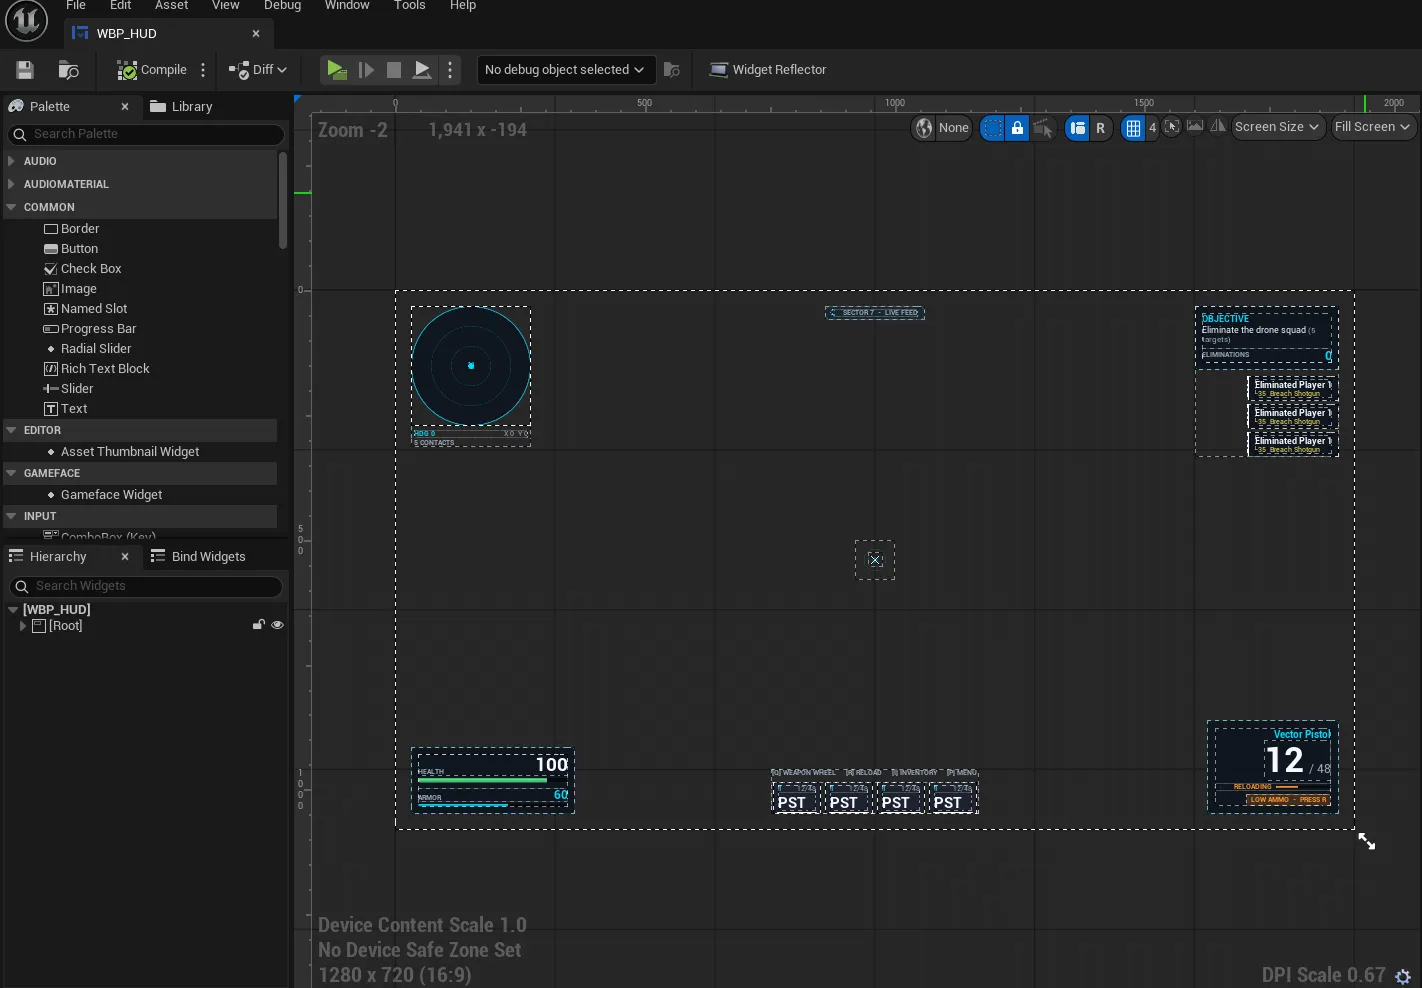
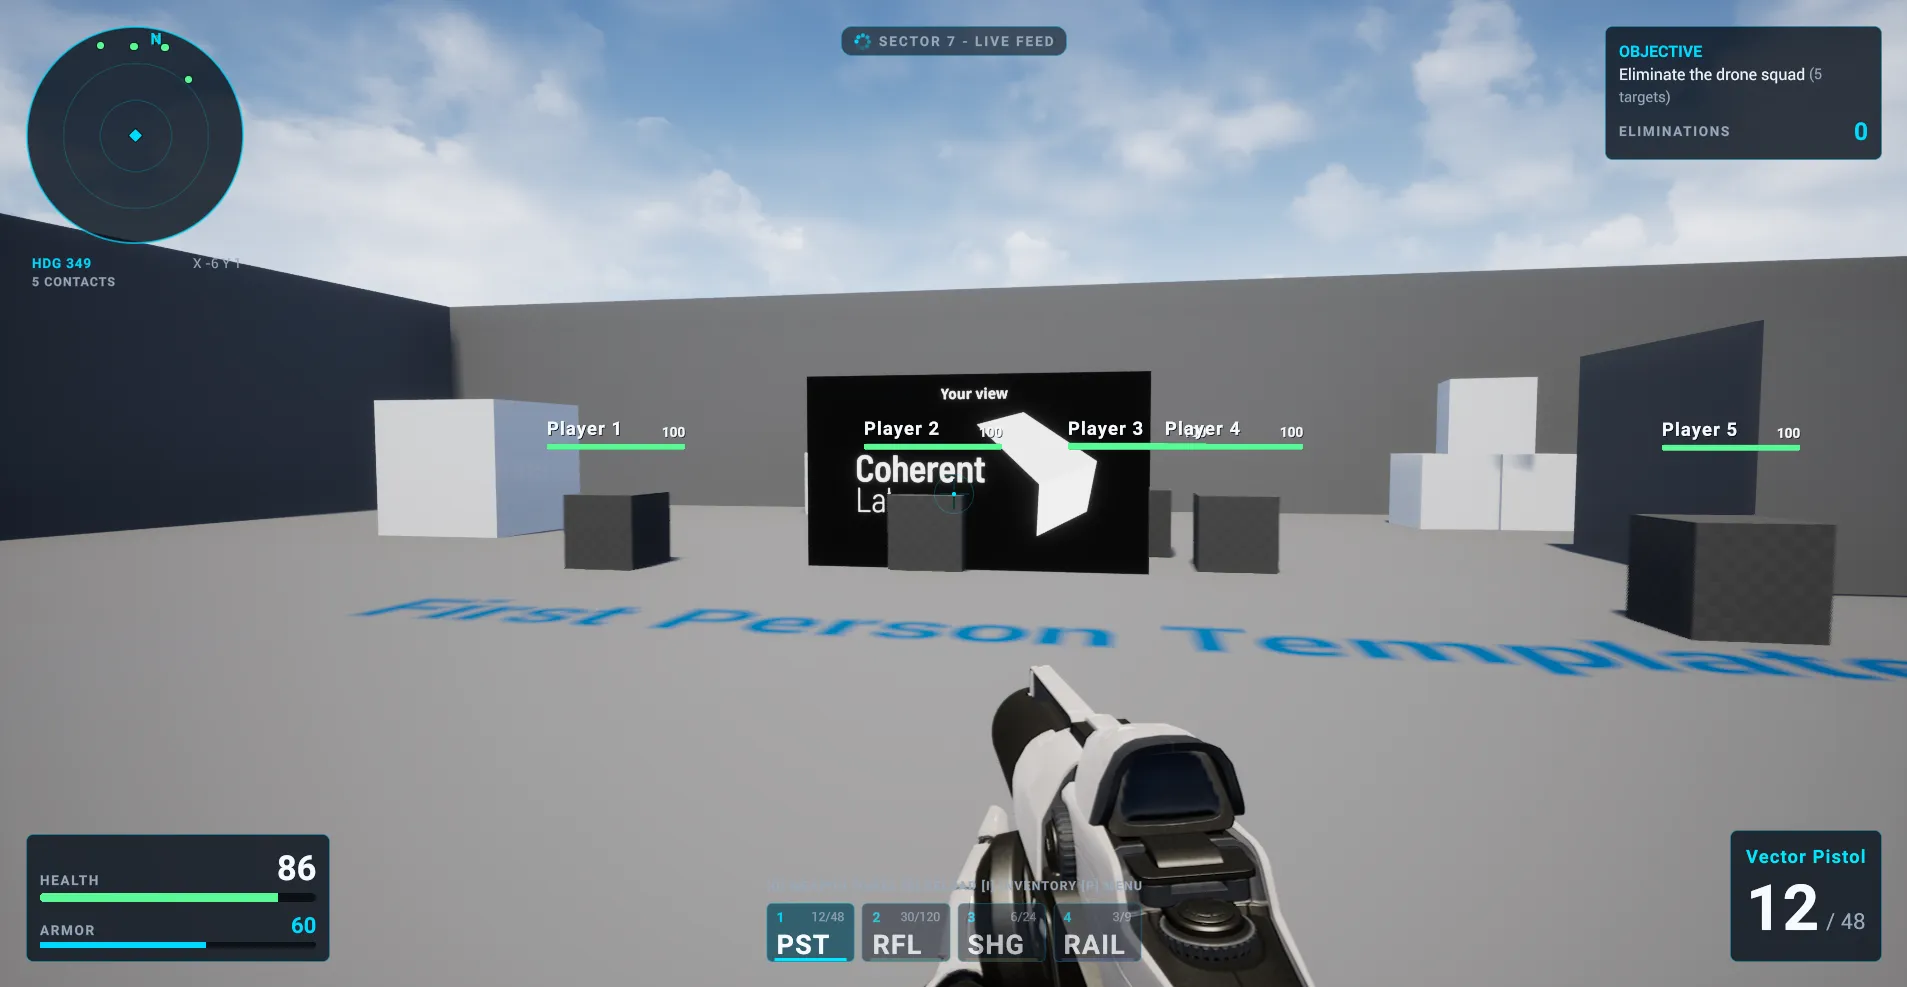
To recreate a UMG screen in Gameface, the agent reads the widget tree and builds a matching page with HTML, CSS, and JavaScript.
It can keep the original UMG widget, load the Gameface page from your HUD and switch between the two versions as needed. Keeping the UMG screen gives you a reference and lets you repeat the conversion if the design changes.
For example, ask:
Convert
WBP_HUDinto a Gameface UI and load it from the level’s Gameface HUD. Keep the original UMG widget unchanged.
Connect the page to game data
Section titled “Connect the page to game data”For values that change during play, such as health, ammunition, and nameplate positions, the agent can add C++ data models and bind them to the page. Gameface then updates the UI as the game state changes.
For example, ask:
Add nameplates for the five players in the level. Bind each player’s name and health from C++, and show the health bar in green, yellow, or red based on its value.
Use Gameface UI components
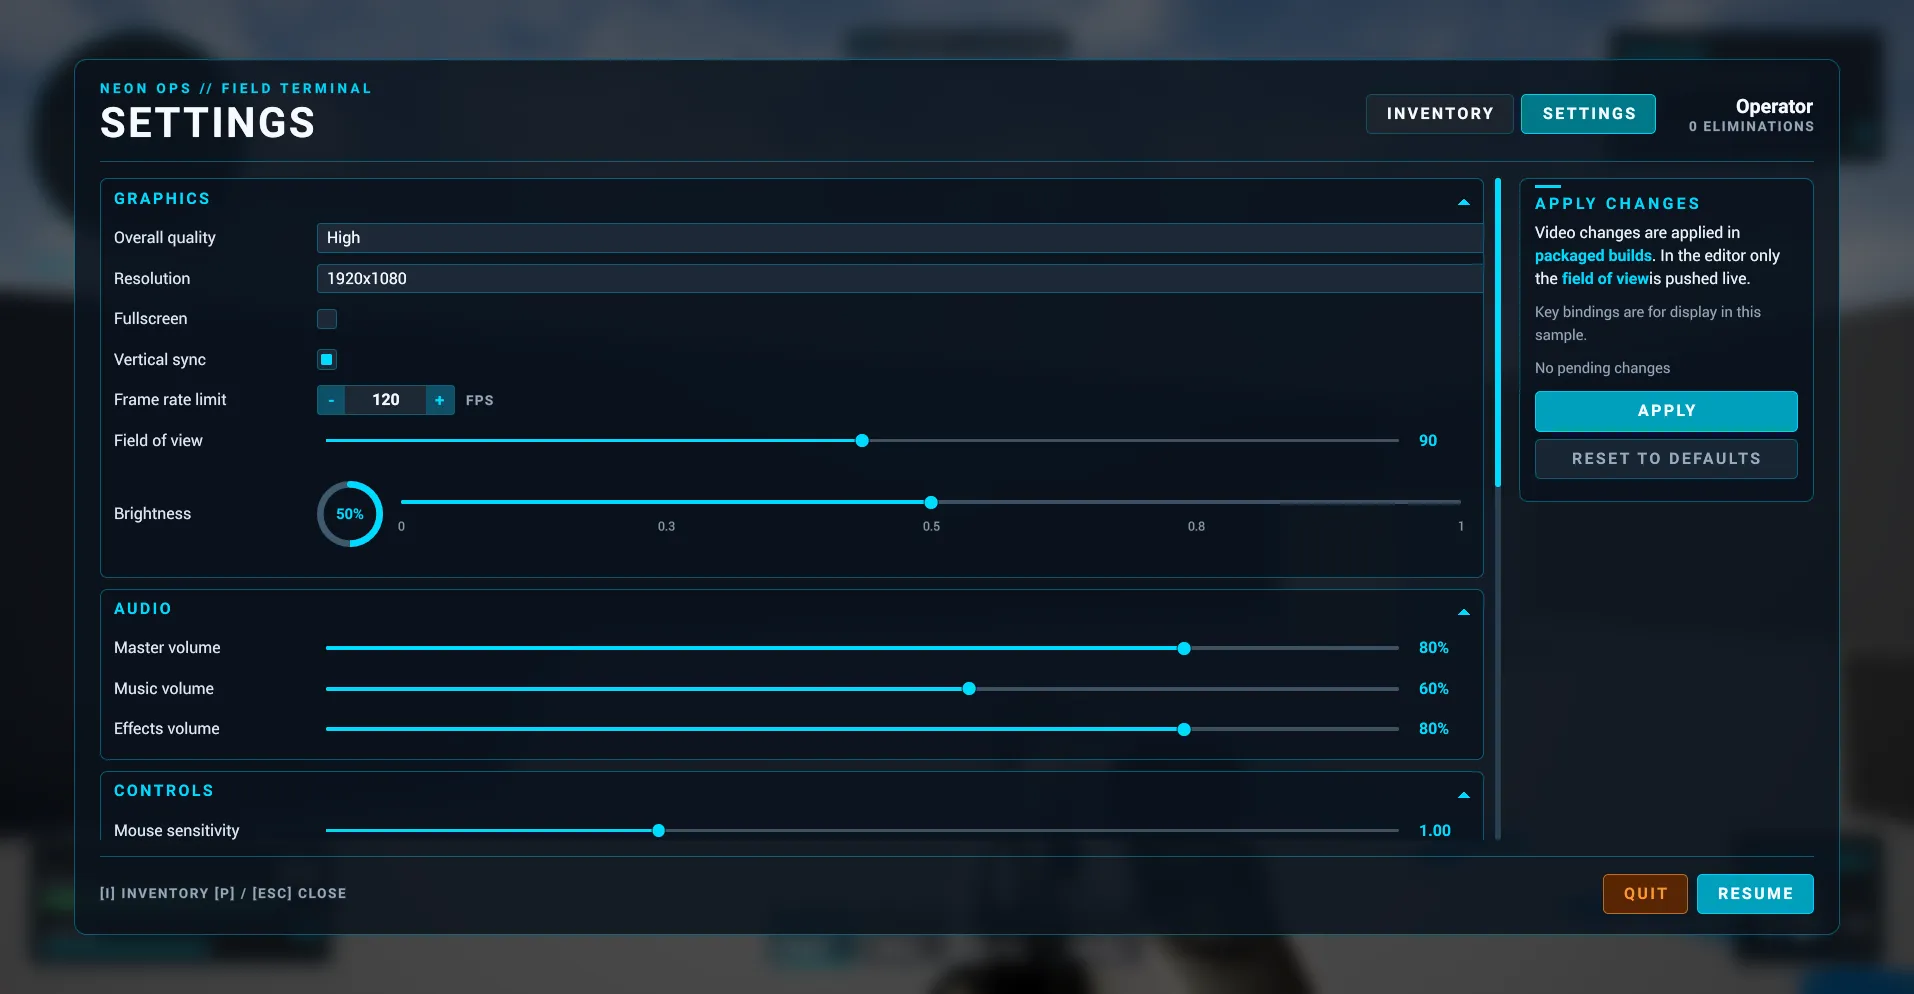
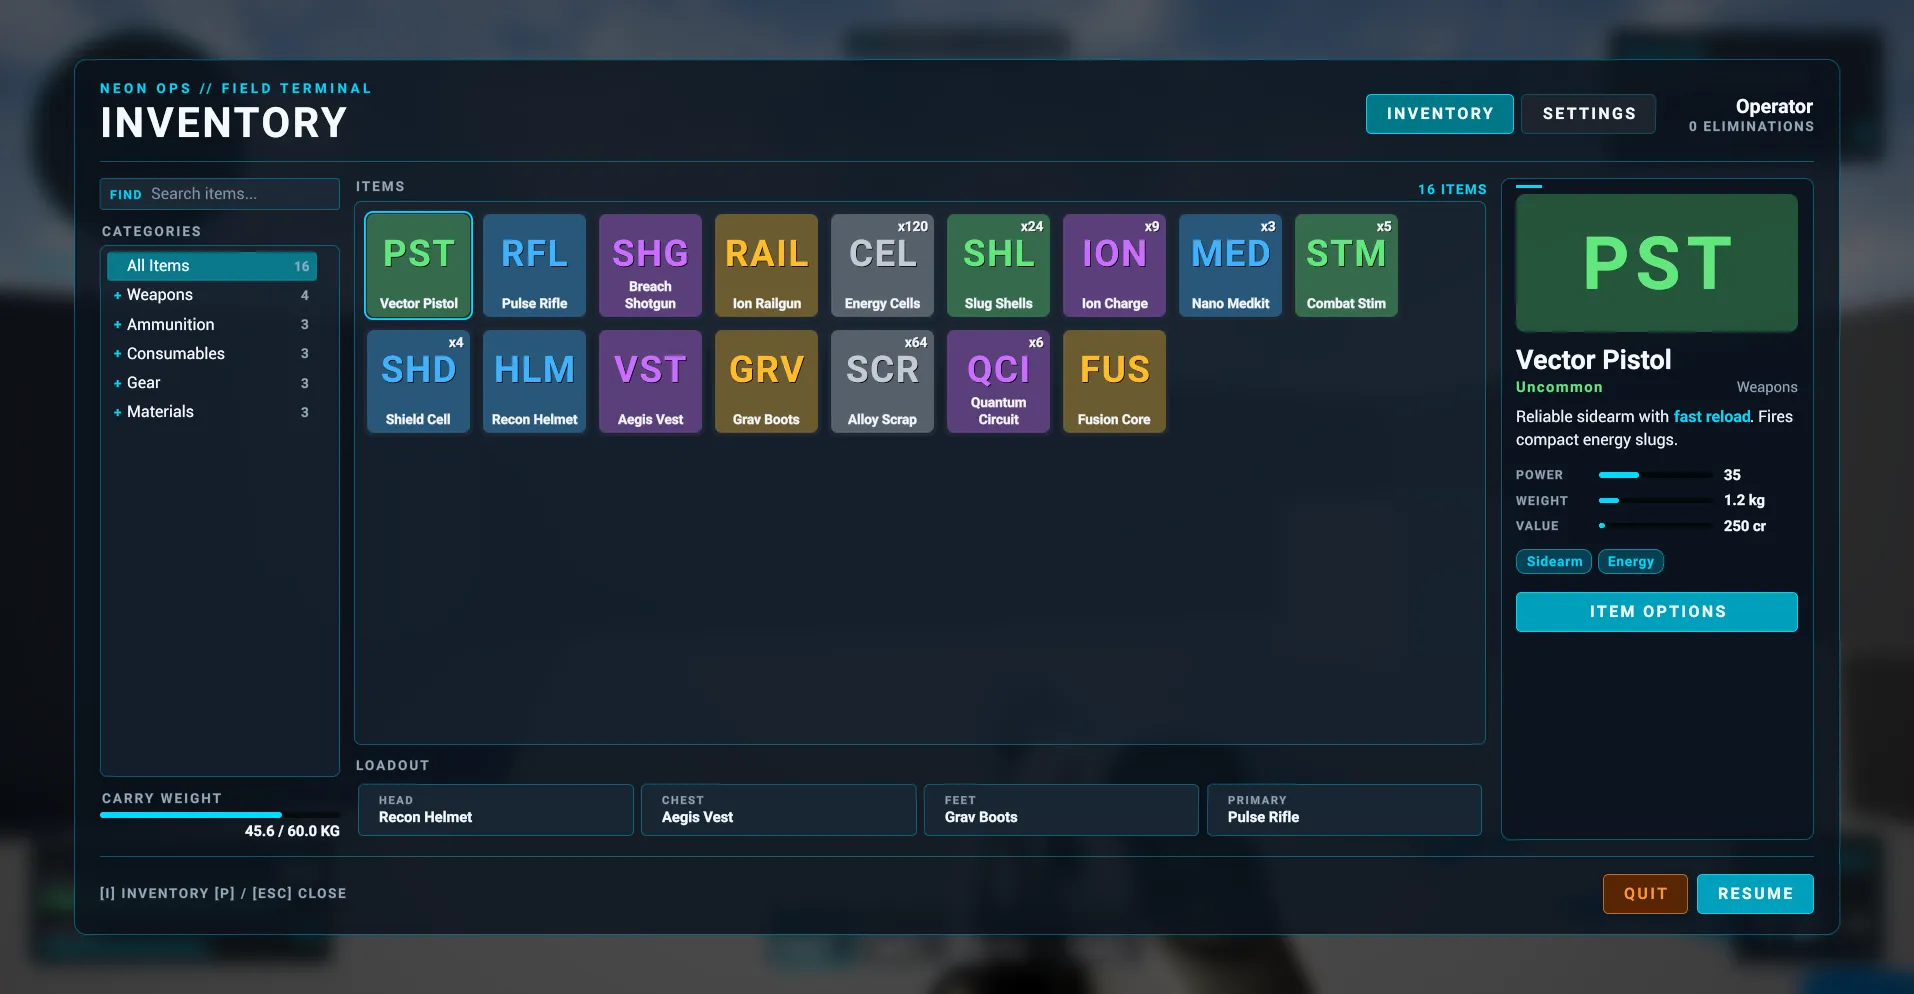
Section titled “Use Gameface UI components”For a settings screen with sliders, dropdowns, scrolling lists, or key bindings, the agent can use components from the Gameface UI library instead of building each control from scratch.
For example, ask:
Rebuild the settings menu with Gameface UI. Keep the same C++ models and events.
Check the result in the game
Section titled “Check the result in the game”Check the work in three places, from quickest to most representative:
- The Gameface Player: Check layout and basic interactions quickly.
- The Play-In-Editor output log: Look for JavaScript errors and Gameface warnings from the running game.
- The in-game view: Connect Gameface MCP to the inspector port shown in the editor’s output log. This lets the agent inspect the page with real game data.
For example, ask:
Start Play-In-Editor, open the settings menu, and check the log for Gameface errors.
- Ask for evidence. Request a screenshot, console output, or relevant log lines rather than relying on a claim that the change works.
- Avoid desktop capture and simulated key presses. They act on whichever window has focus and may affect the wrong application.
- Test the controls yourself. The agent can check that a menu appears and its data is present, but it cannot judge whether the controls feel right during play.
© 2026 Coherent Labs. All rights reserved.